

The Japanese and Chinese versions of breads and pastries tend to be less sweet but they are nonetheless very rich with butter, milk, and eggs. This bread doesn’t look as complicated as it looks and are made by preparing two types of dough a cookie dough and a bread dough. The cookie dough is then encompassed on top of the bread rolls giving a taste that’s a mixture of bread and cookie all in one. The thought of having the best of both worlds is quite intriguing to me both literally and figuratively.

Japanese breads or otherwise called as Pan is sometimes called Meronpan or Melon Ban. Many of the Japanese breads are filled with some kind of filling like custard or green tea filling but these Melon Pan traditionally does not have any filling but I wouldn’t break on that thought just yet. Melon Pans are best eaten the day they are made and do contain eggs in both the bread and the cookie dough. If you would prefer this bread without eggs then substitute the eggs with yogurt or other egg substitute of your choice.

Step-by-Step Pictorial:


Sift flour, powdered milk, yeast and salt into a your mixer or processor bowl. The bread can be kneaded by hand also. In a separate small bowl beat egg and cold water with a small whisk or fork until well combined.


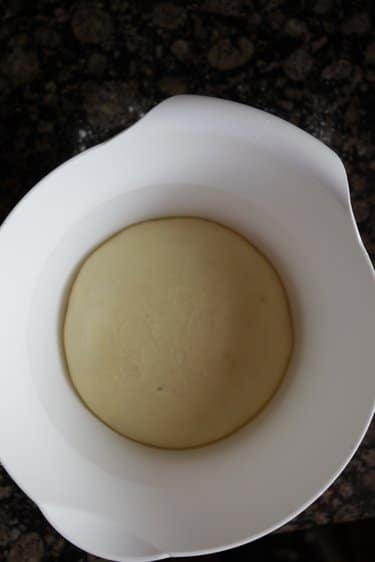
Add the egg mixture to the flour mixture and mix at low-speed first and then at medium speed to form a stiff dough. Now add sugar and knead well until well combined. Now add the butter and knead at low-speed at first and then on medium until the dough is smooth and elastic. The dough should be well kneaded to get the right texture. It took approximately 10 minutes in my mixer to get the right consistency of the dough. Shape the dough into a round and place it on a well oiled bowl, toss to coat the oil throughout the dough. Cover with a plastic wrap and leave it in a warm place to rise until double in volume (about an hour to hour and a half).
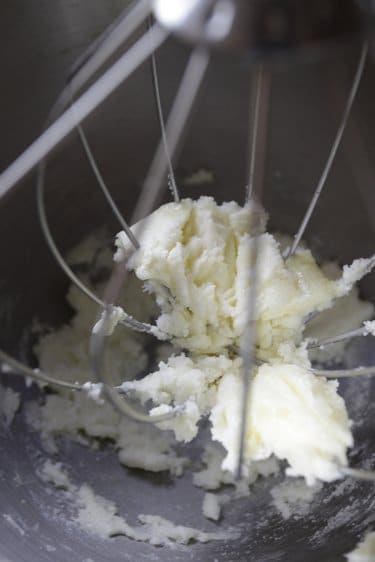

While the dough is rising make the cookie dough. Either with a processor/mixer or by hand cream butter and sugar until fluffy. Add egg, vanilla extract and beat until well combined. In a separate bowl whisk flour, baking powder, and salt. Add the flour mixture to the cream butter-sugar in the mixer bowl and knead until well combine. Add lemon zest if using. Beat until all the ingredients are well combined.
Shape the dough into a cylinder or log shape. Wrap the dough with plastic wrap and refrigerate the cookie dough until required.

Once the bread dough has risen to double its volume, place the dough on a lightly floured surface. Divide the bread dough into 8 equal parts. If you prefer smaller Pans then divide them into 10 equal parts. Using the palm of your hands swirl and round each portion of the bread dough into smooth balls like dinner rolls. Repeat the shaping of the other portions of the bread dough into smooth balls while keeping the dough that are not being worked covered with plastic wrap to avoid the dough getting dried out.


Now take the cookie dough from the refrigerator and divide the cookie dough into 8 or 10 parts the same number as your bread dough. Flatten each portion of the cookie dough between two sheets of plastic wrap. Carefully lift cookie dough slice/round and place them on top of the bread roll. The bread roll may puff up do not flatten it.


Tuck the cookie dough and cover it on top of the bread roll making sure the top and sides of the roll are covered and leaves the bottom out. Holding the covered bread dough from the underside roll the Pan with castor sugar.Using the blunt side of a knife carefully mark the top into a cross hatch/diamond pattern. The carved markings should be deep enough but not cut the dough into halves so that they don’t disappear while the bread rises or bakes. Place the unbaked Pans on a greased or parchment lined baking sheet. Repeat the same process with the other portions of the dough and let it rise for an hour or so.
Preheat oven to 350 F (180 c) and bake them for about 20 to 25 minutes. The Pans are ready when they start to turn brown on top. Do not over bake them as they tend to burn on the underside more quickly than on the top. Cool on a cooling rack. Enjoy!!!

Japanese Melon Pan
Ingredients
-
- For Bread Dough
- All Purpose Flour — 1 3/4 cups (extra if required)
- Milk Powder — 2 Tbsp
- Instant Yeast — 1 tsp
- Salt — 1/2 tsp
- Cold Water — 1/3 cup
- Egg (beaten) — 1
- Sugar -1 Tbsp
- Butter(at room temperature) — 25 gms about 2 Tbsp
For Cookie Dough
- All Purpose Flour — 1 1/3 cups
- Baking Powder — 3/4 tsp
- Salt — a large pinch
- Butter (at room temperature) — 60gms about 5 Tbsp
- Castor Sugar — 1/4 cup or 1/3 cup for sweeter dough
- Egg — 1
- Vanilla Extract — 1/2 tsp
- Lemon Zest — 1 tsp (optional)
- Castor Sugar or granulated sugar — for dusting
Instructions
- Sift flour, powdered milk, yeast and salt into a your mixer or processor bowl. The bread can be kneaded by hand also. In a separate small bowl beat egg and cold water with a small whisk or fork until well combined.
- Add the egg mixture to the flour mixture and mix at low speed first and then at medium speed to form a stiff dough. Now add sugar and knead well until well combined. Now add the butter and knead at low speed at first and then on medium until the dough is smooth and elastic. The dough should be well kneaded to get the right texture. It took approximately 10 minutes in my mixer to get the right consistency of the dough.
- Shape the dough into a round and place it on a well oiled bowl, toss to coat the oil throughout the dough. Cover with a plastic wrap and leave it in a warm place to rise until double in volume (about an hour to hour and a half).
- While the dough is rising make the cookie dough. Either with a processor/mixer or by hand cream butter and sugar until fluffy. Add egg, vanilla extract and beat until well combined. In a seperate bowl whisk flour, baking powder, and salt. Add the flour mixture to the cream butter-sugar in the mixer bowl and knead until well combine. Add lemon zest if using. Beat until all the ingredients are well combined.
- Shape the dough into a cylinder or log shape. Wrap the dough with plastic wrap and refrigerate the cookie dough until required.
- Once the bread dough has risen to double its volume, place the dough on a lightly floured surface. Divide the bread dough into 8 equal parts. If you prefer smaller Pans then divide them into 10 equal parts. Using the palm of your hands swirl and round each portion of the bread dough into smooth balls like dinner rolls. Repeat the shaping of the other portions of the bread dough into smooth balls while keeping the dough that are not being worked covered with plastic wrap to avoid the dough getting dried out.
- Now take the cookie dough from the refrigerator and divide the cookie dough into 8 or 10 parts the same number as your bread doughs. Flatten each portion of the cookie dough between two sheets of plastic wrap. Carefully lift cookie dough slice/round and place them on top of the bread roll. The bread roll may puff up do not flatten it. Tuck the cookie dough and cover it on top of the bread roll making sure the top and sides of the roll are covered and leaves the bottom out. Holding the covered bread dough from the underside roll the Pan with castor sugar.
- Using the blunt side of a knife carefully mark the top into a cross hatch/diamond pattern. The carved markings should be deep enough but not cut the dough into halves so that they don’t disappear while the bread rises or bakes. Place the unbaked Pans on a greased or parchment lined baking sheet. Repeat the same process with the other portions of the dough and let it rise for an hour or so.
- Preheat oven to 350 F (180 c) and bake them for about 20 to 25 minutes. The Pans are ready when they start to turn brown on top. Do not over bake them as they tend to burn on the underside more quickly than on the top. Cool on a cooling rack. Enjoy!!!


